IBM Sterling External Authentication Server (SEAS): Configuration to Microsoft Active Directory
We need to create an authentication profile in SEAS.
Important: The profile name given must be used in the configuration of other products.
Procedure
Accessing the administration console
Open a browser and go to the URL:
https://<seas_server_ip>:9080
Configure the System-Wide LDAP Connection Definition
We will create a global LDAP connection.
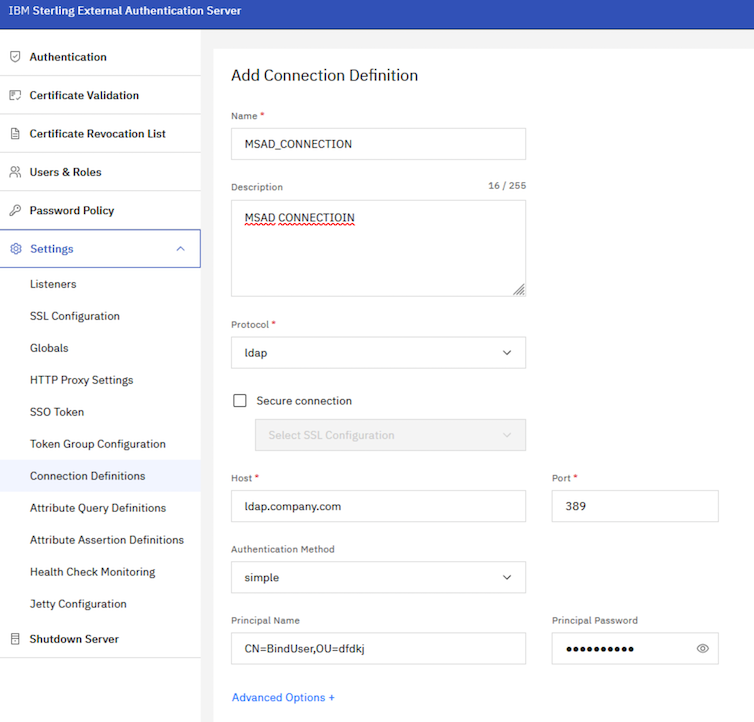
1) Click on the menu System Setting and select the Connection Definitions.
2) Click the Add Connection+ button.
3) Enter the connection details and click Next:
- Name: MSAD_CONNECTION
- Protocol: ldap
- Host: <ACTIVE_DIRECTORY_SERVER_IP>
- Port: 389
- Authentication Method: Simple
- Principal Name: <LDAP_CONNECTION_USER>
- Principal Password: <PASSWORD>
- LDAP Version: 3
4) Confirm the details and click Save
5) Click on Finish and then click Close
In LDAP_CONNECTION_USER provide the distinguished name of user
Configure LDAP Attribute Query Definition
1) Click on the menu System Setting and select the LDAP Attribute Query Definition.
2) Click the Add + button.
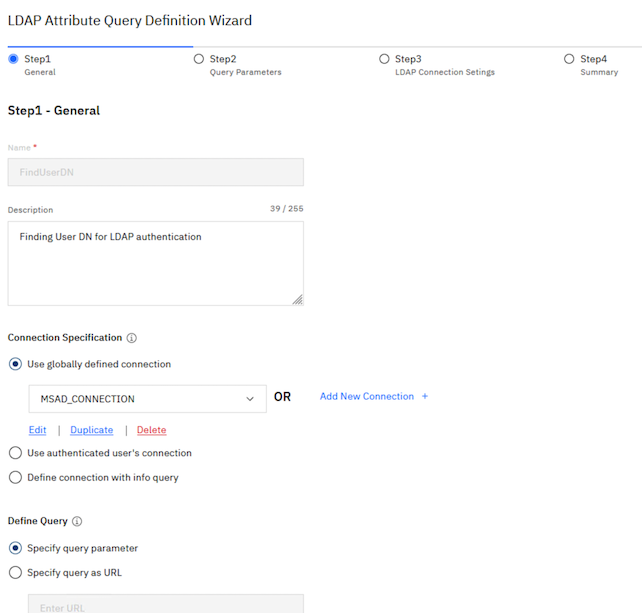
3) In "Step1," enter:
- Name: FindUserDN
- Description: Query to Search Directory for User DN
- Connection specification: select Use globally defined connection... and enter MSAD_CONNECTION
- Define Query: select Specify query parameter
Click Next
4) In "Step2" enter:
- BaseDN: <Specify base DN, sample: DC=TEST,DC=com,DC=br>
- Return Attributes: DN
- Scope: Subtree
Click Add Match Attributes and add:
- Match Attributes: sAMAccountName={userId}
Click Save and Click Next
4) In "Step3"
Click Next
5) In "Step4"
Click Save
Configure Authentication
1) Click on the menu Authentication
3) Click the Add + button.
4) In "Step 1 - General", enter the details and click Next
- Profile Name: MSAD_CCM
- Authentication Type: LDAP
- Host: <ACTIVE_DIRECTORY_SERVER_IP>
- Port: 389
- LDAP principal to bind: select Search for user DN and choose FindUserDN
5) In "Step 2 - LDAP Connection Settings", enter the details and click Next
- Authentication Method: simple
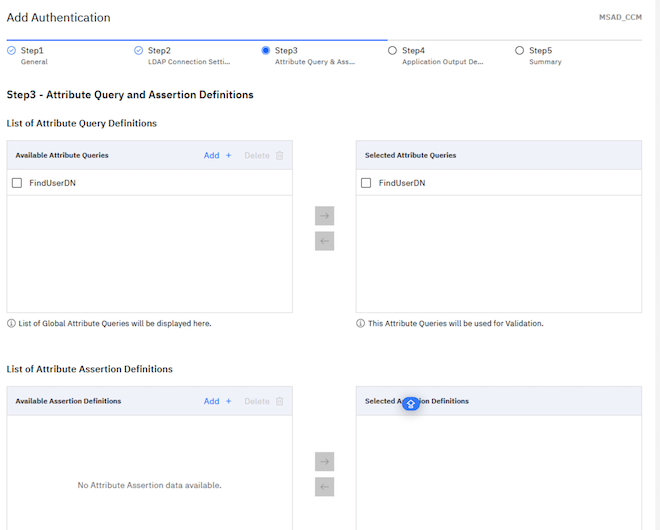
5) In "Step 3 - Attribute Query Definition"
- Add FindUserDN in Selected Attributes Queries box
click Next
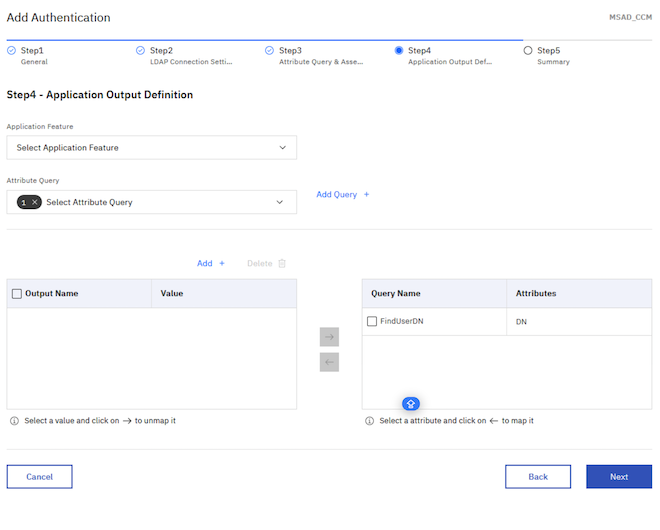
6) In "Step 4 - Application Output Definition"
- Add FindUserDN in the right box
click Next
7) Confirm the details and click Save
The new profile has been created.
See also
- IBM Sterling External Authentication Server (SEAS): Instalação
- IBM Sterling External Authentication Server (SEAS): Configuração para OpenLDAP
- IBM Sterling External Authentication Server (SEAS): Configuração para MS Active Directory
- IBM Sterling: Configurando o Single Sign-on entre o SSP, SEAS, B2BI e SFG


